Trek Overview
The Legendary Sar Pass Trek Traverse Ancient Pine Forests trails Glide Down Massive Himalayan Snow Slopes
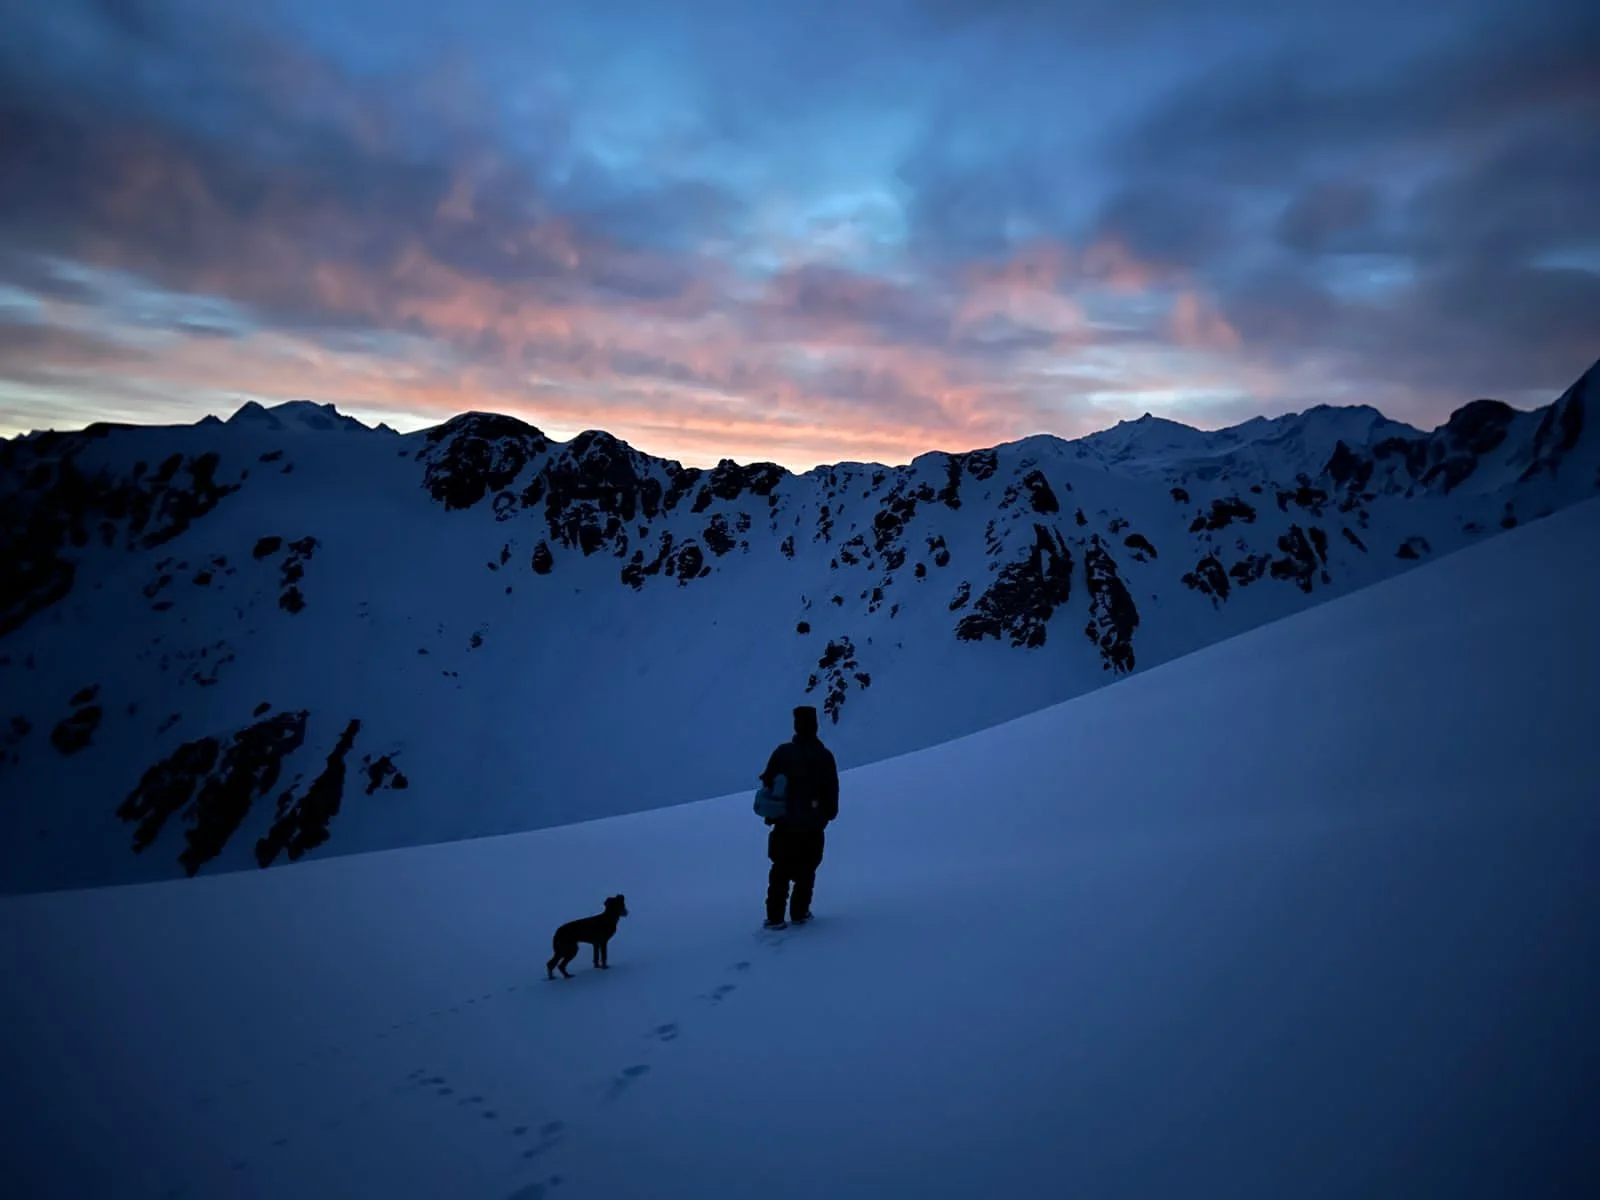
A Scenic Himalayan Escape at 4,206 m
The Sar Pass Trek is one of the best beginner-friendly treks in India. It is perfect for those who want to experience diverse landscapes in a single journey. From dense forests and wide green meadows to charming villages and snow-covered mountains, this trek offers a complete Himalayan adventure.
Located in the scenic Parvati Valley of Himachal Pradesh, Sar Pass is a popular choice among trekking enthusiasts. The route is well-marked and well-established, making it safe and suitable for both beginners and experienced trekkers.
Nestled in the Parvati Valley of the Kullu district, the trek begins from Kasol and passes through lush forests, sparkling streams, and expansive alpine meadows. The journey culminates at the breathtaking Sar Pass, situated at an altitude of 4,206 meters (13,799 ft).
This trek is ideal for first-time trekkers and adventure seekers looking for a moderately challenging yet manageable Himalayan experience. With panoramic views of snow-capped peaks, roaring rivers, and verdant valleys, the Sar Pass Trek offers an unforgettable glimpse into the beauty of the high Himalayas.
Sar Pass Trek Complete Guide
Our mission has always been to ensure that no trekker steps into the Himalayas without the right perspective. A trek is not just a checklist of summits; it is a serious commitment to the outdoors. Having the right information is what separates a reckless climb from a soulful journey.
This section serves as your definitive manual for the Sar Pass Trek. We have distilled years of mountain experience and real-time feedback into this guide to give you a clear, honest picture of the trail.
We provide this depth of information because we want you to be more than just a visitor—we want you to be a prepared, responsible trekker who respects the mountains as much as we do
Trek Itinerary
1: Short Itineary
Overview: Trek Summary
DAY 1 – Report at Kasol Base camp before 9:30 AM. – All Group meet together- and Trek Himalyan Soul team take 01 Hours for Briefing for the Sar Pass Trek | Same Day Start Trek from Kasol to Grahan village
Distance: 07 km | Trek Time: 5/6 hours | Altitude: 7,709 ft | Overnight Stay: at Home Grahan
DAY 2 - Trek from Grahan village to Min Thach Camp
Distance: 07.5 km | Trek Time: 6/7 hours | Altitude: 11,154 ft | Overnight Stay: Camp at–Twin/ Three Sharing
DAY 3 - Trek from Min Thach Camp to Nagaru Base of Sar Pass
Distance: 05 km | Trek Time: 5/6 hours | Altitude: 12,400 ft | Overnight Stay: Camp at–Twin/ Three Sharing
DAY 4 - Trek from Nagaru Base to Biskeri Thach via SAR Pass Summit
Altitude: 13,600 ft | Distance: 12 km | Trek Time: 7/8 hours| Cross to Sar Pass to Biskeri Camp Altitude 11,100 ft | Overnight Stay: Camp at–Twin/ Three Sharing
DAY 5 - Trek from Biskeri Thach to Pulga Road
Distance: 06 km | | Trek Time: 4/5 hours | Same Day Drive to Kasol Market -Distance: 15 km | Trek Time: 1 hours
2: Detailed Day-wise Itinerary
A Complete Route & Campsite Breakdown
Detailed Day Wise Itinerary Day - 1
Day 1: Reach Our Base Camp Kasol 8:30 am to 9:00am Then trek to Grahan Village
Route:
- Starting Point: Kasol Bus Stand Base Camp of H.H
- Destination: Grahan Village
- Distance: Approximately 07 kilometers
- Time Required: Around 4-6 hours, depending on your pace and breaks
- Difficulty Level: Moderate
Trek Details:
- Pickup from Kasol Bus Stand Trek Himalyan Soul Camp:
- Kasol is well-connected by road, and you can easily reach there by bus or taxi from nearby towns like Bhuntar or Manali. Once you arrive at Kasol Bus Stand, you can start your trek.
- Trekking to Grahan Village:
- The trail starts from Kasol and leads towards Grahan Village. You’ll need to cross the Parvati River and then start ascending through dense forests.
- The initial part of the trek involves a gradual ascent through the forest, with occasional steep sections.
- The trail is well-marked, but it’s recommended to have a local guide or a map with you.
- As you ascend, you’ll pass through lush greenery, pine forests, and possibly encounter some streams.
- After a few hours of trekking, you’ll reach the beautiful Grahan Village, situated at an altitude of around 7,700 feet above sea level.
- Grahan Village is a quaint Himalayan hamlet, offering stunning views of the surrounding peaks and valleys.
- Difficulty Level:
- The trek from Kasol to Grahan Village is considered moderate in difficulty.
- While the trail is well-defined, there are some steep sections, especially during the ascent.
- Proper trekking gear, including sturdy hiking shoes, water, snacks, and a rain jacket (depending on the weather), is recommended.
- It’s also essential to pace yourself and take regular breaks, especially if you’re not used to hiking at higher altitudes.
- ImportantTips:
- Start your trek early in the morning to make the most of daylight hours and avoid trekking in the dark.
- Carry an adequate amount of water and snacks to keep yourself hydrated and energized throughout the trek.
- Respect the local culture and environment. Avoid littering and follow the principles of Leave No Trace.
- Check the weather forecast before starting your trek and be prepared for changes in weather conditions.
Day - 2
Day 2 : Trek from Grahan to Mini Thatch
Route:
- Starting Point: Grahan Village
- Destination: Mini Thatch
- Distance: Approximately 7-8 kilometers
- Time Required: Around 4-5 hours, depending on your pace and breaks
- Difficulty Level: Moderate
Trek Details:
- Starting from Grahan Village:
- From Grahan Village, head towards the trail leading to Mini Thatch. You’ll find signposts or locals who can guide you in the right direction.
- The trail initially ascends through dense forests, similar to the previous segment from Kasol to Grahan.
- You’ll pass through scenic landscapes, lush greenery, and possibly encounter some streams along the way.
- Ascend to Mini Thatch:
- The trek involves a significant ascent as you make your way towards Mini Thatch.
- The trail may become steeper and more challenging compared to the previous segment. Be prepared for some strenuous sections.
- As you climb higher, you’ll be rewarded with breathtaking views of the surrounding valleys and snow-capped peaks.
- Mini Thatch is a beautiful meadow nestled amidst the mountains, offering a tranquil setting for camping or resting.
- Difficulty Level:
- The trek from Grahan to Mini Thatch is considered moderate to difficult, primarily due to the steep ascent.
- You’ll need to have a good level of fitness and stamina to tackle the uphill sections.
- Proper trekking gear, including sturdy hiking shoes, trekking poles (if required), water, snacks, and warm clothing, is essential.
- Take regular breaks to catch your breath and enjoy the scenery along the way.
- Important Tips:
- Start early in the morning to make the most of daylight hours and avoid trekking in the dark.
- Carry sufficient water and snacks to keep yourself hydrated and energized during the trek.
- Be mindful of your surroundings and follow the trail markers or ask locals for directions if needed.
- Take precautions against altitude sickness, especially if you’re ascending to higher elevations.
- Respect the local environment and leave no trace of your visit.
Trekking from Grahan Village to Mini Thatch offers a challenging yet rewarding experience amidst the natural beauty of the Himalayas. Enjoy the journey and embrace the serenity of the mountai
Day - 3
Day 3 : Trek from Mini Thatch to Naguru
Trekking from Mini Thatch to Nagaru is a segment that takes you further into the scenic landscapes of the Parvati Valley, eventually leading you to the base camp for the Sar Pass trek. Here’s a guide for this part of your journey:
Route:
- Starting Point: Mini Thatch
- Destination: Nagaru
- Distance: Approximately 5-6 kilometers
- Time Required: Around 3-4 hours, depending on your pace and breaks
- Difficulty Level: Moderate to Difficult
Trek Details:
- Beginning from Mini Thatch:
- Depart from Mini Thatch and follow the trail towards Nagaru. The route may be marked with signs or cairns, but it’s advisable to have a local guide or a map to navigate effectively.
- The initial part of the trek involves ascending further through alpine meadows and possibly rocky terrain.
- You’ll continue to enjoy panoramic views of the surrounding mountains and valleys as you gain altitude.
- Ascent to Nagaru:
- The trail gradually becomes steeper as you ascend towards Nagaru.
- You may encounter some challenging sections with rocky paths and uneven terrain.
- It’s essential to pace yourself and take regular breaks, especially considering the altitude gain.
- Keep an eye out for any trail markers or signs to ensure you’re on the right path.
- Views and Landscape:
- Along the way, you’ll be treated to stunning views of the Parvati Valley below and the towering peaks surrounding you.
- Nagaru itself is situated at a higher altitude, offering breathtaking vistas of the Himalayan landscape.
- Difficulty Level:
- The trek from Mini Thatch to Nagaru is considered moderate to difficult, primarily due to the steep ascent and potentially challenging terrain.
- Altitude gain can also be a factor, so it’s essential to acclimatize properly and be prepared for the effects of high altitude.
- Ensure you have the necessary trekking gear, including sturdy hiking shoes, warm clothing, water, snacks, and a first aid kit.
- ImportantTips:
- Start early in the day to make the most of daylight hours and avoid trekking in the dark, especially considering the terrain’s difficulty.
- Stay hydrated and fuel yourself with snacks to maintain energy levels throughout the trek.
- Keep an eye on weather conditions, as they can change rapidly in mountainous regions.
- Follow Leave No Trace principles and respect the environment and local communities.
Day - 4
Day 4 : Trek from Naguru to SAR Pass to Biskeri Thatch
Trekking from Nagaru to Sar Pass and then descending to Biskeri Thatch is one of the most exhilarating segments of the Sar Pass trek, offering breathtaking views and a sense of accomplishment as you traverse high-altitude landscapes. Here’s a guide for this challenging yet rewarding trek:
Route:
- Starting Point: Nagaru
- Destination: Biskeri Thatch via Sar Pass
- Distance: Approximately 12-13 kilometers
- Time Required: Around 8-10 hours, depending on your pace and breaks
- Difficulty Level: Difficult
Trek Details:
- Setting out from Nagaru:
- Begin your trek from Nagaru, situated at a considerable altitude. Ensure you’re properly acclimatized before embarking on this challenging segment.
- The initial part of the trek involves ascending towards Sar Pass. The trail is likely to be steep and rocky, requiring careful footing and endurance.
- Ascending to Sar Pass:
- As you ascend towards Sar Pass, the trail may become progressively steeper and more challenging.
- You’ll navigate through rugged terrain, possibly encountering snowfields or icy patches, depending on the season.
- Keep an eye out for trail markers or follow the guidance of your guide to stay on track.
- Sar Pass, situated at an elevation of around 13,800 feet, offers breathtaking views of the surrounding peaks and valleys, making the ascent worth the effort.
- Crossing Sar Pass:
- Once you reach Sar Pass, take some time to rest and soak in the stunning vistas before beginning your descent towards Biskeri Thatch.
- The descent from Sar Pass to Biskeri Thatch can be equally challenging, with steep gradients and potentially slippery terrain. Use trekking poles for stability if necessary.
- Descending to Biskeri Thatch:
- The trail from Sar Pass descends through alpine meadows and forests, providing a contrast to the rugged terrain of the ascent.
- While the descent may be less physically demanding than the ascent, it requires caution to navigate safely, especially on uneven terrain.
- Biskeri Thatch, nestled amidst the mountains, offers a serene camping spot to rest and rejuvenate after the day’s trek.
- Difficulty Level:
- The trek from Nagaru to Sar Pass and then to Biskeri Thatch is considered difficult, primarily due to the steep ascent, high altitude, and potentially challenging terrain.
- Proper acclimatization, physical fitness, and trekking experience are essential prerequisites for this segment.
- Ensure you have the necessary equipment, including sturdy hiking shoes, warm clothing, trekking poles, water, snacks, and a first aid kit.
- Important Tips:
- Start early in the day to allow ample time for the trek and to avoid trekking in low visibility conditions, especially during the descent.
- Stay hydrated and nourished throughout the trek to maintain energy levels.
- Keep a close watch on weather conditions and be prepared for changes in mountain weather.
- Follow Leave No Trace principles and respect the environment and local culture during your trek
Day - 5
Day 5: Trek from Biskeri Thatch to Pulga road
Trekking from Biskeri Thatch to Pulga Road offers a scenic route through the picturesque landscapes of the Parvati Valley. Here’s a guide for this segment of your trek:
Route:
- Starting Point: Biskeri Thatch
- Destination: Pulga Road
- Distance: Approximately 10 kilometers
- Time Required: Around 5/6 hours, depending on your pace and breaks
- Difficulty Level: Moderate
Trek Details:
- Departing from Biskeri Thatch:
- Begin your trek from Biskeri Thatch, situated amidst the mountains and alpine meadows.
- The trail initially descends from Biskeri Thatch, gradually leading you towards lower elevations.
- Scenic Views along the Way:
- As you descend, you’ll be treated to breathtaking views of the surrounding valleys, lush forests, and distant peaks.
- The trail winds its way through forests, meadows, and possibly small streams, offering a varied and picturesque landscape.
- Traversing through Villages:
- Along the route, you may pass through or encounter several small villages inhabited by the locals.
- These villages provide a glimpse into the local way of life and may offer opportunities to interact with the residents.
- Navigating the Trail:
- While the trail is generally well-defined, it’s advisable to have a map or GPS device to ensure you’re on the right path.
- Signposts or markers may guide you along the way, but it’s always helpful to ask locals for directions if needed.
- TrekkingLevel:
- The trek from Biskeri Thatch to Pulga Road is considered moderate in difficulty.
- While the overall terrain may involve some descents and ascents, it’s generally less challenging compared to higher altitude treks.
- However, be prepared for uneven terrain, rocky sections, and possibly some steep gradients, particularly as you descend towards Pulga Road.
- ImportantTips:
- Start your trek early in the day to make the most of daylight hours and avoid trekking in the dark.
- Carry sufficient water, snacks, and any necessary supplies for the trek.
- Wear sturdy hiking shoes and comfortable clothing suitable for trekking.
- Respect the environment and local communities along the way, and adhere to Leave No Trace principles.
- Check the weather forecast before setting out and be prepared for changes in weather conditions.
- The route from Pulga to Kasol involves driving back along the road you trekked on or taking any alternate routes available. The primary road network connects these two destinations.
- Distance:
- The distance between Pulga and Kasol by road is approximately 15-20 kilometers, depending on the specific route you take.
- RoadConditions:
- The road conditions can vary, but in general, the roads in this region are narrow and winding, often with steep inclines and declines.
- Some sections of the road may be rough or unpaved, especially in more remote areas.
- DrivingTime:
- The driving time from Pulga to Kasol typically ranges from 30 minutes to an hour, depending on traffic, road conditions, and the specific route taken.
- ScenicViews:
- The drive from Pulga to Kasol offers stunning views of the surrounding mountains, valleys, and forests. Be sure to take some breaks along the way to admire the scenery and take photographs.
3: Sar Pass Trek Difficulty
What is the Difficulty Level of Sar Pass Trek?
The Sar Pass Trek in Himachal Pradesh is categorized as a Moderate difficulty Himalayan trek, making it one of the top choices for beginners entering high-altitude trekking and for intermediate trekkers looking for a challenging yet achievable adventure. With its diverse terrain, snow-covered trails, high-altitude campsites, and stunning summit views, this trek offers the perfect balance of excitement and safety when done with proper preparation. The Sar Pass Trek is considered a moderate trek, suitable for trekkers with some prior trekking experience.
Here are some factors that contribute to its level of Moderate or difficulty:
1. Terrain Difficulty: The trail to Sar Pass features a mix of landscapes that gradually become more challenging as you gain altitude. The trail consists of various terrains, including steep ascents, narrow ridges, rocky sections, and snow patches, especially in the early summer months. You will encounter steep climbs and descents, requiring good physical fitness, balance, and endurance. The terrain can be challenging and demanding at times, requiring careful footing and cautious navigation. Trekkers will experience:
- Easy and scenic forest trails in the beginning
- Steep ascents from Min Thach to Nagaru
- Narrow ridges and icy sections at higher altitudes
- A snow-covered climb during the Sar Pass summit push
- A long, thrilling descent through snowfields
This combination of terrain makes Sar Pass one of the most rewarding moderate treks in the Himalayas.
2. Altitude Challenges: The trek reaches an altitude of approximately 13,800 feet (4,200 meters) at Sar Pass. As you ascend to higher altitudes, the air becomes thinner, and the oxygen levels decrease. This can cause altitude-related challenges such as shortness of breath, fatigue, and altitude sickness. It is essential to acclimatize properly, stay hydrated, and listen to your body’s signals.
As you climb higher, the oxygen level decreases, and temperatures drop significantly. While the altitude is manageable for most trekkers, proper acclimatization and hydration are essential to avoid altitude-related issues
3. Daily Trekking Distance: Trekkers typically cover 6–10 km per day, depending on the campsite and weather conditions. The trail includes:
- Gradual walks through forests
- Moderate climbs
- A steep ascent to Nagaru (the toughest day)
- Snow trekking on summit day
The varied pace makes the trek suitable for beginners with basic fitness.
4. Weather and Temperature: Weather conditions in the mountains can be unpredictable, even during the best trekking seasons. You may encounter rain, snow, and cold temperatures, especially at higher altitudes. It is important to pack appropriate clothing and gear to withstand changing weather conditions. Weather plays a key role in difficulty:
- Daytime: 8°C to 15°C
- Nighttime: -5°C to 0°C at higher camps
- Wind and snow on summit day can make the final climb more challenging
Wind, snowfall, and icy surfaces on summit day can increase the difficulty. Trekkers must carry thermal layers, waterproof jackets, gloves, and sturdy trekking shoes to ensure safety and comfort.
5. Fitness Requirement: Although suitable for first-time trekkers, basic fitness is important. You should be able to:
- Walk for 4–6 hours a day
- Handle steep climbs without exhaustion
- Maintain stamina and breathing control
A 3–4 week fitness routine consisting of brisk walking, jogging, stair climbing, and breathing exercises is ideal for preparing for the Sar Pass Trek.
6. Technical Skills: The Sar Pass Trek does not require technical climbing skills. However, trekkers must be comfortable:
- Walking on snow
- Using trekking poles
- Wearing microspikes if needed during summit day
Experienced trek leaders guide you through all tricky sections.
7. Ideal for beginners and Intermediate Trekkers: Sar Pass is often recommended as the best moderate Himalayan trek for beginners, thanks to:
- Well-marked trails
- Manageable altitude gain
- Strong support from experienced guides
- Balanced difficulty level
At the same time, the snow sections and changing landscapes make it exciting for seasoned trekkers as well.
8. Duration and Distance: The Sar Pass Trek is a 5-day, 4-night adventure, covering a distance of approximately 37 km through the stunning Parvati Valley. You’ll trek 4-7 hours daily, starting from Kasol (1,580m) to the summit at 13,800 ft.
9. Camping and Facilities: The trek involves camping in tents at designated campsites along the route. Basic facilities like toilet tents and a limited water supply are available, but you should be prepared for rustic camping conditions.
Is Sar Pass Trek is Safe?
Set amidst the high-altitude ranges, concerns regarding Sar Pass trek safety are indeed very valid questions. We have all the possible probabilities calculated if anything goes off the schedule. At every stop point of the journey, trekkers will be going through a properly guided session informing them about the upcoming terrains. All our professionals strive their best to provide trekkers with the best experience possible.
4: Best Time Visit Sar Pass trek
The best season to do the Sar Pass Trek is the summer season, from April to mid-June. This period offers the perfect balance of pleasant weather, beautiful snow views, and safe trekking conditions.
Why April to Mid-June Is the Best Time?
1. Pleasant and Stable Weather
During these months, the weather remains mostly clear and stable. Day temperatures range between 10°C to 20°C, which makes trekking comfortable. Nights can drop to 0°C to 5°C near the pass, but the cold is manageable with proper clothing.
2. Snow Experience Without Extreme Risk
In April and early May, you can still see fresh snow near the pass. This allows trekkers to enjoy snow-covered landscapes without facing harsh winter storms. By June, most of the heavy snow starts melting, making the trail easier for beginners.
3. Clear Views of the Himalayas
Summer usually brings clear skies and excellent visibility. You can enjoy panoramic views of surrounding Himalayan peaks and valleys without fog or heavy clouds blocking the scenery.
4. Safe and Open Trails
Unlike the monsoon season (July–September), there is very little rainfall during this time. This means fewer chances of slippery paths, landslides, or trail closures. Winter months bring heavy snowfall and extreme cold, which can make trekking difficult and risky. That is why summer is considered the safest and most suitable season.
5. Beautiful Natural Scenery
From mid-April onwards, lower meadows begin to bloom with wildflowers. The combination of green valleys, melting snow, and clear blue skies makes the landscape especially beautiful during this period.
Which Month Should You Choose?
1. Best Month
- April–May: Best for snow lovers.
- May–June: Ideal for beginners who want less snow and easier trails.
2. Weather Conditions
During April to mid-June, weather conditions are comfortable for trekking:
- Day Temperature: 10°C to 20°C
- Night Temperature: 0°C to 5°C near the pass
3. Snow Conditions:
Snow is present near the higher camps and the pass, especially in April and May.
- Maximum Snow: April to early May
- Snow Starts Melting: Late May to June
- Best Month for Snow Lovers: April and early May
If you want to walk on snow and enjoy white landscapes, April is perfect. If you prefer less snow and easier trails, choose late May or June.
4. Wind & Visibility:
Skies are mostly clear with good visibility. Winds can be strong near the pass, but overall conditions remain manageable.
These balanced weather conditions make trekking easier and safer.
5. Trail Conditions
- Summer: Clear, open, and safe trails
- Monsoon: Slippery paths and risky river crossings
- Winter: Heavy snow can block sections of the route
This is why April to mid-June is considered the safest and most practical season.
Who Should Go When?
- Beginners: May to June (less snow, easier trails)
- Snow Lovers: April to early May
- Budget Trekkers: Early June (less rush, stable weather)
5: How to reach base camp ?
To reach Kasol, the base village for the Sar Pass Trek, you can follow these general directions:
- By Air: The nearest airport to Kasol is Bhuntar Airport, located approximately 31 kilometers away. You can take a flight to Bhuntar Airport from major cities like Delhi or Chandigarh. From the airport, you can hire a taxi or take a local bus to Kasol.
- By Train: The nearest major railway station to Kasol is Pathankot Railway Station, which is well connected to major cities in India. From Pathankot, you can take a bus or hire a taxi to reach Kasol. Another option is to take a train to Chandigarh Railway Station and then continue your journey to Kasol by bus or taxi.
- By Road: Kasol is well-connected by road and can be reached by bus or taxi from various cities. Here are a few common routes:
- From Delhi: You can take a bus from Delhi to Bhuntar, which is the nearest major town to Kasol. From Bhuntar, you can take a local bus or hire a taxi to reach Kasol, which is approximately 30 kilometers away.
- From Chandigarh: You can take a bus or hire a taxi from Chandigarh to Kasol. The distance between Chandigarh and Kasol is around 275 kilometers.
- From Manali: If you are coming from Manali, you can take a local bus or hire a taxi to Kasol. The distance between Manali and Kasol is approximately 80 kilometers.
Some important points to note for Sar Pass
Please note that we don’t provide timing schedules for transportation before Manali. Subject to various conditions, the scheduled timings and availability of particular rides may differ.We recommend that trekkers reach out to our teams with any queries.You can drop an email or call us for an initial guided session.Our teams will be collecting trekkers at fixed points of airports, railway stations, and bus stands.It is recommended that unless any delay arrives, trekkers are advised to reach the destinations at least 2 hours prior.
Phone Connectivity and ATM Transactions
- Because connectivity along the route is unpredictable, we urge people to do all of their work ahead of time.
- Trekkers will be provided with walkie-talkies beforehand in case of emergency.
- The last ATM transactions available will be at Kasol but we recommend travelers to collect cash beforehand or while in Manali as ATM availability at other places might not dispense cash at times.
6: Prepration and fitness tips
6-Week Plan specifically tailored for Trek Himalyan Soul requirements.
1. Trek Himalyan Soul Fitness Criteria for the Sar Pass Trek
Trek Himalyan Soul emphasizes that a trekker should be able to cover a certain distance comfortably to ensure they don't get exhausted before the summit.
The Benchmark: Cover 5 km in 30 to 35 minutes.
2. The 6-Week "Trek Himalyan Soul" Training Schedule
Weeks 1-2: Base Building (The "Startup" Phase)
- Running: 3 days a week. Run/Walk 3 km.
Strength (Modified for your notes):
- Knee Pushups: 3 sets of 15 (Total 45).
- Half Squats: 4 sets of 18 (Total 72).
- Plank: 2 sets of 30 seconds.
Focus: Getting the heart rate up and opening the lungs.
Weeks 3-4: Endurance Loading (The "Intermediate" Phase)
- Running: 4 days a week. Increase distance to 4.5 km.
Strength (Modified for your notes):
- Forward Lunges: 3 sets of 15 reps per leg.
- Half Squats: 4 sets of 20.
- Plank: 3 sets of 40 seconds.
Trek Himalyan Soul Tip: Start walking with your actual trekking shoes once a week to break them in and avoid blisters on the trek.
Weeks 5-6: Peak & Approval (The "Summit" Phase)
- Running: 4 days a week. Target: 5 km in 32-35 minutes.
Strength (Modified for your notes):
- Stair Climbing: Climb 3-4 floors 5 times. (Excellent for the Sar pass summit slope).
- Knee Pushups: 3 sets of 20.
- Plank: 1 set of 90 seconds (or 3 sets of 30s).
Proof: Ensure you have recorded at least 3-4 successful 5km runs on your app.
3. Modified Exercise Breakdown (As per your request)
| Exercise | Target for Sar Pass | Trek Himalyan Soul Logic |
|---|---|---|
| Jogging/Running | 5 km (35 mins) | Ensures your heart can handle low oxygen at 13,799 feet |
| Knee Pushups | 45 Reps (3x15) | Builds shoulder strength for your 10kg rucksack. |
| Half Squats | 72 Reps (4x18) | Protects your knees during the steep descent from the summit. |
| Forward Lunges | 30 Reps total | Essential for balance on slippery "Hard Ice" patches. |
| Planks | 1 Minute total | Keeps your posture straight while climbing with a bag. |
4. "Trek Himalyan Soul" kye point for Sar pass fitness
- Kasol /Gharan Base Camp 01- This is where your oxygen levels and fitness will first be checked.
- Micro spikes & Gaiters: Trek Himalyan Soul usually provide these. Your training (specifically lunges) will help you walk comfortably while wearing this extra weight on your feet.
- Hydration (The 4L Rule): Trek Himalyan Soul guides are very strict about water. Practice drinking 3-4 liters of water during your training weeks.
- AMS (Acute Mountain Sickness): If you are fit, your body uses oxygen better, significantly reducing your chances of headaches or nausea at the summit.
5. What to show the Trek Himalyan Soul Team:
- Strava/Nike Profile: A screenshot or link showing you have been active for at least 4 weeks.
- Medical Certificate: Unlike just fitness apps, Trek Himalyan Soul requires a signed Medical Fitness Certificate by a doctor.
- Consistency: Show them that you didn't just run once, but you have been "Trek-Fit" for a month.
This is a suggestion that will help you on your trek, but if you are generally fit and healthy, you can prepare according to your own preferences.
Frequently Asked Questions
Where is Sar Pass trek ?
What is Best time visit Sar Pass trek ?
Trek Fee
Complete Package from Kasol to Kasol
Extra Notes
Ethics, Health & Safety
Safety Over Summit: The mountain will always be there, but your safety is irreplaceable. Knowing when to turn back due to weather or health is the mark of a true trekker.
Respect the Altitude: Above 10,000 ft, your body follows its own rules. Prioritize acclimatization and consistent hydration; never ignore the early signs of altitude sickness.
Mountain Ethics (Leave No Trace): Carry your trash back. We are guests in the wilderness ensure the trails remain as pristine as you found them.
Trust the Experts: Local guides understand the mountain’s temperament better than any map. Follow their advice—it is based on years of survival and experience.
Physical Readiness: A trek is a physical commitment. Arriving fit ensures that you don't just endure the trail, but actually enjoy the journey.
Trek Information
- Difficulty: Moderate
- Duration: 5 Days / 4 Nights
- Altitude: 13,799 ft
- Distance: 37 Kms
- Region: Himachal Pradesh
- Basecamp: Kasol Bus Stand
- Accommodation: Homestay/Tents
- Suitable For: 15 to 60 years
- Cloakroom: Available
- Offloading: Available